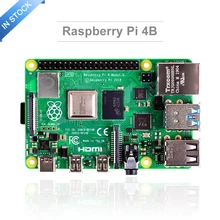
In an attempt to self-host this blog, I have built an ARM/RPi compatible Docker image for Jekyll. You can build it yourself by running docker build -t jekyll-rpi . or download my image from Dockerhub using docker pull danobot/jekyll-rpi.
The image is 1GB in size and any suggestions to reduce this file size would be appreciated. Leave a comment or edit this page using the link near the post title to submit your changes.
Dockerfile (if you want to build yourself)
FROM arm32v7/ruby:2.4.2-jessie

RUN apt-get update \
  && apt-get install -y --no-install-recommends \
    node \
    python-pygments \
  && apt-get clean \
  && rm -rf /var/lib/apt/lists/
RUN wget https://cmake.org/files/v3.10/cmake-3.10.1.tar.gz
RUN tar xzf cmake-3.10.1.tar.gz && rm cmake-3.10.1.tar.gz

RUN cd cmake-3.10.1 && ls && ./configure --prefix=/opt/cmake  && make
RUN  cd cmake-3.10.1 &&  make install


RUN gem install \
  github-pages \
  jekyll \
  jekyll-redirect-from \
  kramdown \
  rdiscount \
  rouge
VOLUME /src
EXPOSE 4000
WORKDIR /src
RUN cd /bin && ln -s /opt/cmake/bin/cmake cmake

ENV LC_ALL C.UTF-8
ENV LANG en_US.UTF-8
ENV LANGUAGE en_US.UTF-8
ENV JEKYLL_ENV production
ENTRYPOINT ["bash"]
This image packages jekyll, allowing you to run jekyll build without having to set up ruby, bundler, gem and all that good Ruby stuff1 (which can get incredibly frustrating).
We can run this image using the following command:
docker run -it --name jekyll-build -v /home/pi/repos/blog:/src danobot/jekyll-rpiWe then need to run bundle install inside the container before we can use it.
docker exec jekyll-build bundle installWe can now use our image:
docker exec jekyll-build jekyll build JEKYLL_ENV=production
Serving
Now that we’ve got our jekyll-build container ready to build our jekyll blog, we need a way to serve the generated HTML. Jekyll stores the generated site in the _site directory. All we need to do is set up an nginx web server to serve that directory.
Create a docker-compose.yaml file with the following contents:
version: '3.3'
services:
  web:
    container_name: blog-serve
    image: lroguet/rpi-nginx:latest
    ports:
      - 80:80
    volumes:
      - ~/repos/blog/_site:/var/www/html
If you followed my previous tutorial on how to set up SSL and a reverse proxy, then add the labels, networks and expose section as explained in the linked post. This configures your reverse proxy to route internet traffic to your Jekyll webserver container.
Automated Daily Builds
The following script pulls your latest repository changes and rebuilds your _site directory. It starts up your jekyll-build container, regenerates your blog, and then shuts down that container (as its only required to generate the static HTML).
rebuild-blog.sh
JEKYLL_DIR=~/repos/blog

cd $JEKYLL_DIR
git pull

docker stop blog-serve
sudo rm -rf _site

docker start jekyll-build
docker exec jekyll-build jekyll build JEKYLL_ENV=production
docker stop jekyll-build

docker start blog-serve
You can add this script to a Cron job by typing crontab -e and adding the following line to it:
0 2 * * * /bin/bash /home/pi/repos/blog/rebuild-blog.sh

