Are you facing a frustrating blinking LED issue with your beloved Xonar U7 sound card when trying to connect it to your Windows PC? You’re not alone. Many users have encountered this problem, but fear not, there are solutions that can get your sound card up and running again without resorting to drastic measures. In this blog post, we’ll explore how to troubleshoot the Xonar U7 flashing LED issue and ensure your device is recognized by Windows.
In preparation for a recent house party, I dust off my trusty Xonar U7 sound card for some quality music playback. However, when I plugged it into my PC, I was greeted with a rapidly blinking blue LED, and Windows failed to recognize the device. My PC even was unable to boot with the soundcard connected during start-up. Frustrated, I sought a solution, and here’s what I discovered.
Kitchen Multi-Timer Pro
Now you’re cooking
Multi Timer Pro is your ultimate meal prep companion, keeping track of multiple cooking times and making adjustments on the fly. Give it a try today and become a better home cook!

![]()
![]()
Why I chose not to buy a new soundcard
Now, you might be wondering why I didn’t simply buy a replacement online (such as the latest MKII version of the Xonar U7) and bin my seemingly problematic sound card. The answer is twofold.
- Firstly, my eyes watered at the sight of the prices these soundcards are sporting these days, especially in AUD. The MKII model can be quite expensive (as was the one I purchased sometime around 2013). I was also somewhat sentimentally attached to my original Xonar U7, which had faithfully served me for many years during my university party days.
- Secondly, I believed that there might be a solution to the issue and I wanted to explore all possible avenues before giving up on a device that had provided me with excellent audio quality and performance in the past. Sometimes, with a bit of research and troubleshooting, you can revive older hardware and save both money and the environment by not contributing to electronic waste
And, naturally, considering the ongoing challenges related to the cost of living and climate change… and striving to address the issue of planned obsolescence (in whatever small measures I can)
Advertisement Begins
Advertisement End
Understanding the Issue
The issue can be seen in this YouTube video. Pressing the volume knob leads to a distinct hardware malfunction that produces a spark-like sound, causing the device to crash and reboot.
My internet research provided some insights into resolving the problem, however, I urge you to read the entirety of my post as hardware alterations may not be necessary. It seems this device and its driver on current versions of Windows are riddled with issues.
A Cautionary Note
The following video was the first one I consulted – again, do not rush into this. You may not even need to open up your device as I explain in the remainder of this post.
Some users have suggested removing resistors. However, this may not be necessary and it’s crucial to understand the potential risks and consequences of hardware alterations.
Investigating Potential Solutions
After diving into the comments section of those YouTube videos and attempting to fix the issue myself, I came across several potential theories to the Xonar U7 blinking LED issue:
- Temperature Sensitivity: Some users speculate that certain components of the sound card require a specific temperature to function correctly. To test this theory, try warming the sound card in your hand or leaving it on top of your PC for a few minutes. This problem is particularly prevalent in colder climates or winter seasons.
- Powered USB Hub: Plug your Xonar U7 into a powered USB hub instead of directly into your PC. This might help stabilize the device’s power supply. The commenter suggested flicking the power off and on a few times, as it started to work normally for him after that procedure.
- Try a Different Machine: Test your Xonar U7 on another machine, even a Linux-based one, as some users have reported success with different operating systems. Plug it into another machine, play some audio and after that it should work again.
- Use a different USB port: Windows remembers the device on a specific USB port and may shortcut any attempt to load its driver for subsequent attempts. Use a different port to circumvent this to force Windows to recognise your soundcard as a new device. Some users have found success with this strategy.
Advertisement Begins
Advertisement End
Steps to Resolve the Issue
After experimenting with these solutions, I managed to get my Xonar U7 sound card working again. Here’s a step-by-step guide to help you do the same:
- Enable Windows 8 Compatibility Mode: Before installing the Xonar U7 driver, enable Windows 8 compatibility mode by right-clicking on the driver installer. You can do this by running the “Check compatibility troubleshooter.”
- Install the Driver: Proceed with driver installation, ignore any error messages about InstallShield being unable to find the device.
- Warm the Sound Card: As mentioned earlier, warm the sound card in your hand or place it on your PC for a few minutes.
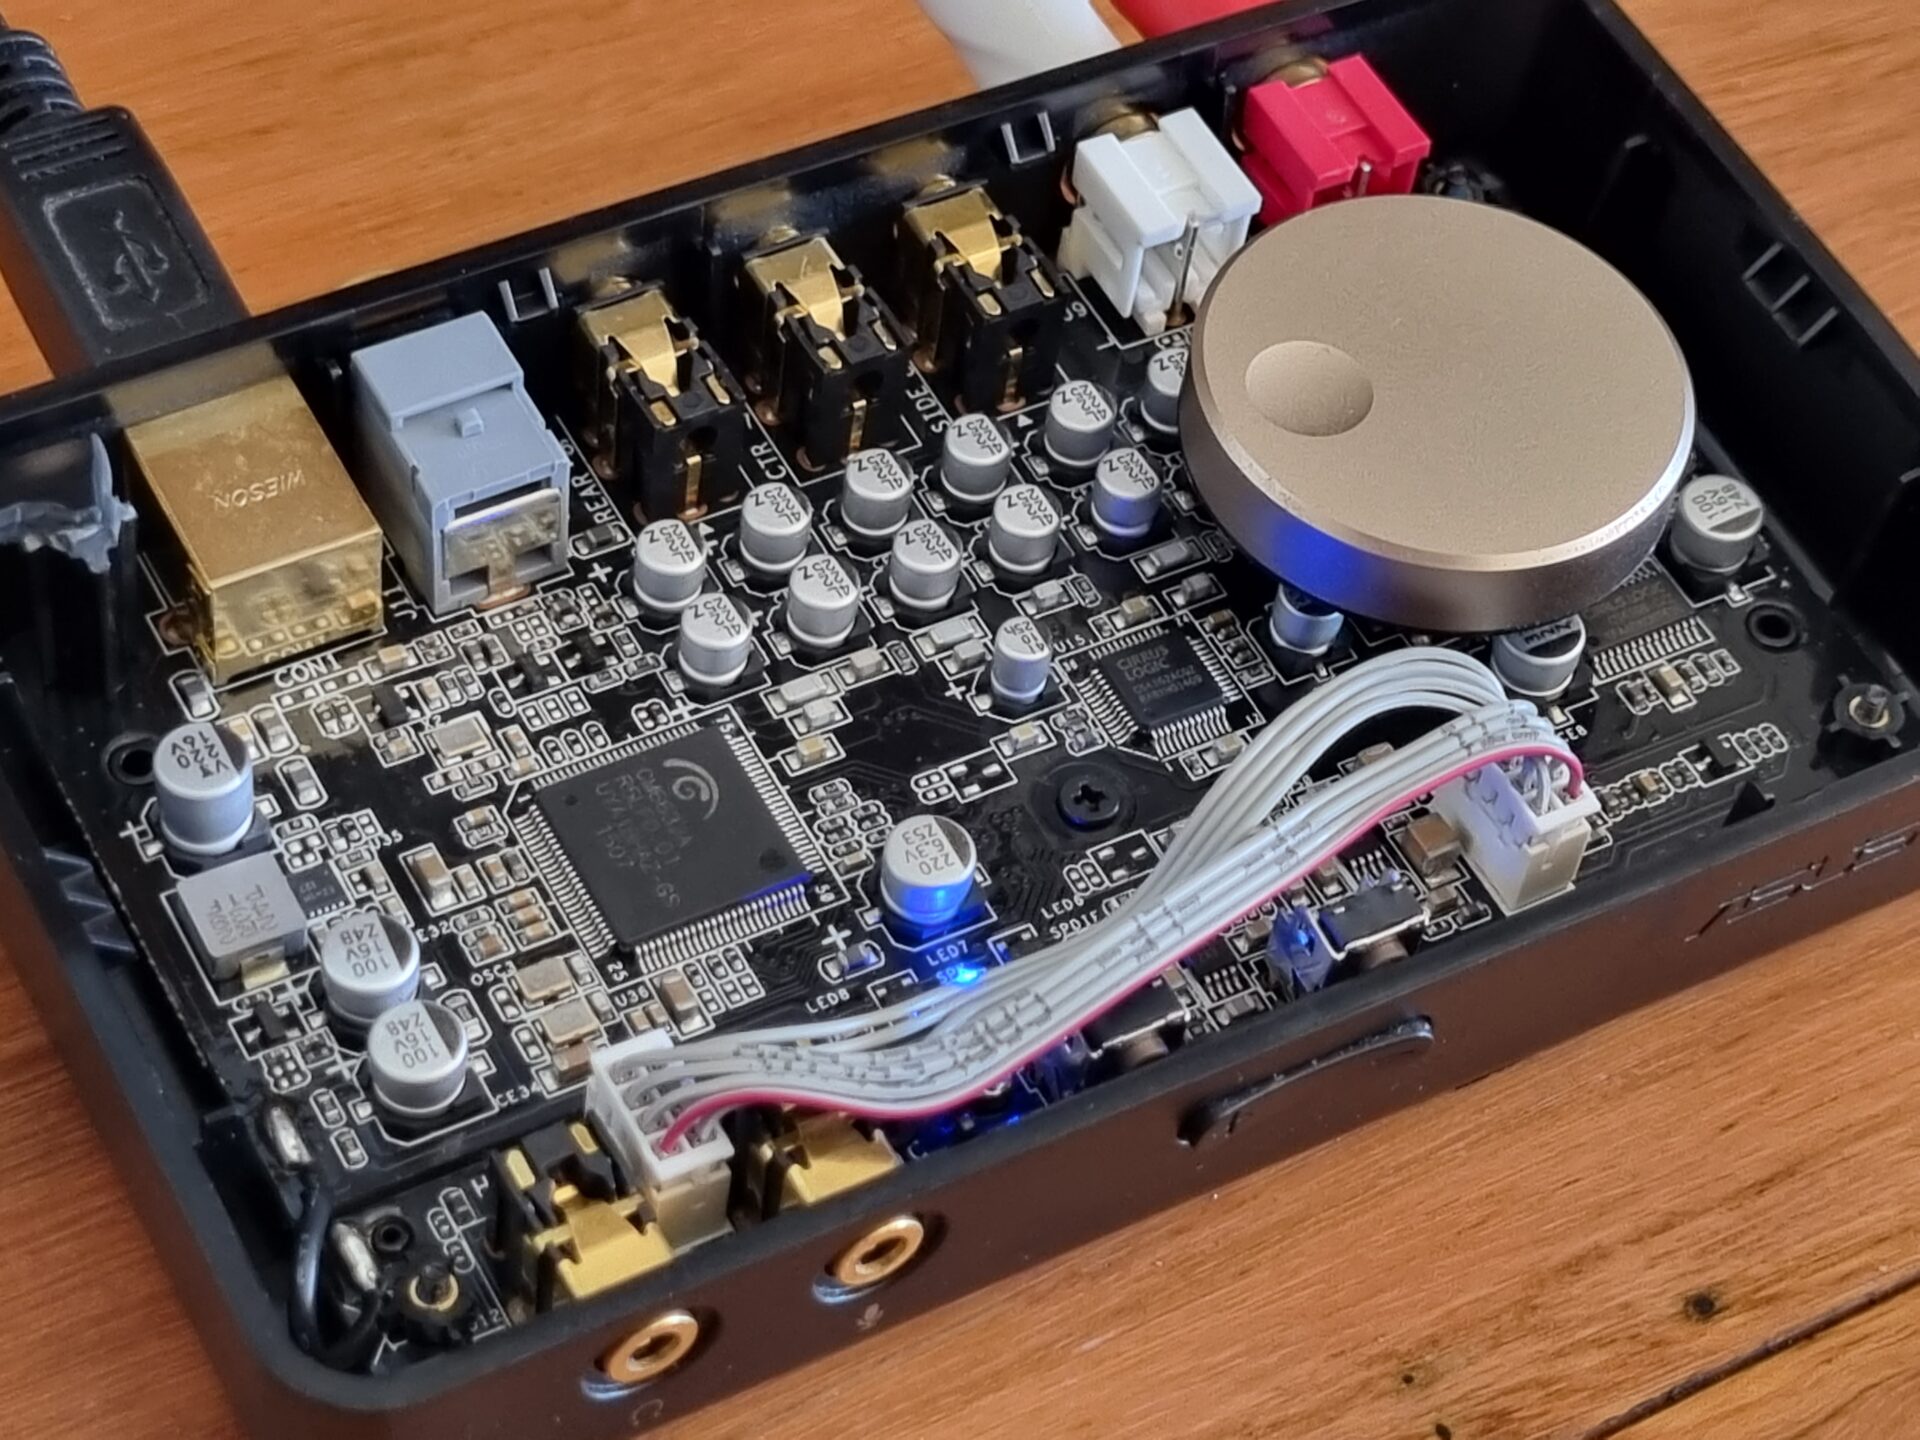
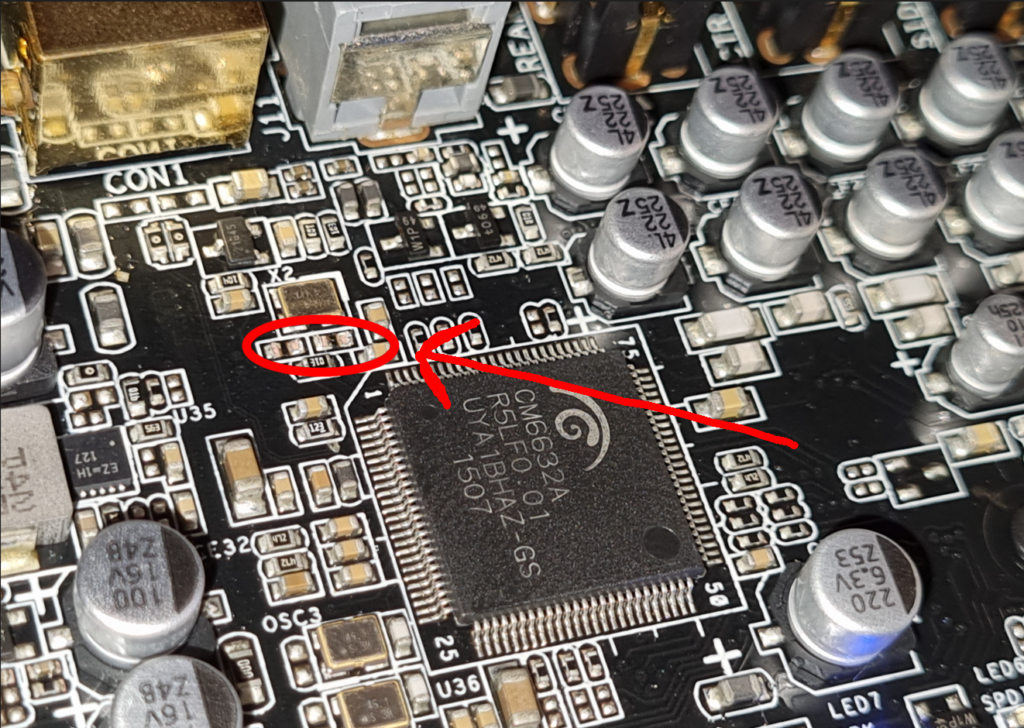
- Touch the Resistors: If the connect fails, gently touch the resistors highlighted in the image below. Be cautious. You can try unplugging and replugging the soundcard while holding the resistors with your finger. Try shifting your finger between attempts. Be careful not to touch the large square main chip. After a few attempts, you may hear the Windows “device connected” sound. It caught me by surprise actually, but it’s how I eventually resolved the issue.
- Try to play some audio: The audio may sound choppy and broken. The same thing happened to me, simply replug the soundcard.
- Unplug and reconnect: To resolve the audio issue, simply replug the soundcard and it should work as good as new.
After completing these steps, you should see the “This device is ready to use” notification, indicating that your Xonar U7 sound card is recognized by Windows and ready to rock.
For the sake of completeness: I did pinch off those two resistors using tweezers, as suggested in the video. If you are still facing issues, it may be necessary to do the same. You can pry open the plastic case using a screwdriver. Do this at your own risk.
Conclusion
Remember, these solutions come with a degree of uncertainty, and there may be other factors at play. Proceed with caution, and consider seeking professional assistance if you’re uncomfortable with these troubleshooting steps.
By following these guidelines, you can hopefully breathe new life into your Xonar U7 sound card and enjoy high-quality audio once again. Remember, always prioritize your safety and the integrity of your hardware.
Hopefully, this write-up helped you resolve your issues. If however, you wish to opt for a brand new sound card, consider using the affiliate link below as I receive a small kickback at no extra cost to you. This helps support the work I do on this blog.
MY MISSION
This blog started nearly 10 years ago to help me document my technical adventures in home automation and various side projects. Since then, my audience has grown significantly thanks to readers like you.
While blog content can be incredibly valuable to visitors, it’s difficult for bloggers to capture any of that value – and we still have to work for a living too. There are many ways to support my efforts should you choose to do so:
Consider joining my newsletter or shouting a coffee to help with research, drafting, crafting and publishing of new content or the costs of web hosting.
It would mean the world if gave my Android App a go or left a 5-star review on Google Play. You may also participate in feature voting to shape the apps future.
Alternatively, leave the gift of feedback, visit my Etsy Store or share a post you liked with someone who may be interested. All helps spread the word.
BTC network: 32jWFfkMQQ6o4dJMpiWVdZzSwjRsSUMCk6